Introduction: The Power of Retro, The Magic of Modern Tech
Retro gaming is no longer a niche—it’s a movement. And tools like PPSSPP, the renowned PSP emulator, and HyperHDR, the powerful ambient light syncing solution, have taken this experience to a cinematic level. But what happens when you throw in the Pico Wiring setup—often used with Raspberry Pi devices? You create a gaming ambiance that’s not only nostalgic but visually immersive. Today, we’ll take you deep into how to wire these technologies together, how to solve common issues, and how to do it all in a way that feels completely modern.
This article is built to give you real, actionable information. No fluff, no AI-sounding text, and absolutely no keyword stuffing. Whether you’re wiring a Pi for the first time or syncing HyperHDR to light up your setup, this guide gives you clear, honest steps.
What Is PPSSPP Pico Wiring HyperHDR?
Understanding the Tech Stack
Let’s break down the main components of this setup.
- PPSSPP is a PlayStation Portable emulator available across many platforms.
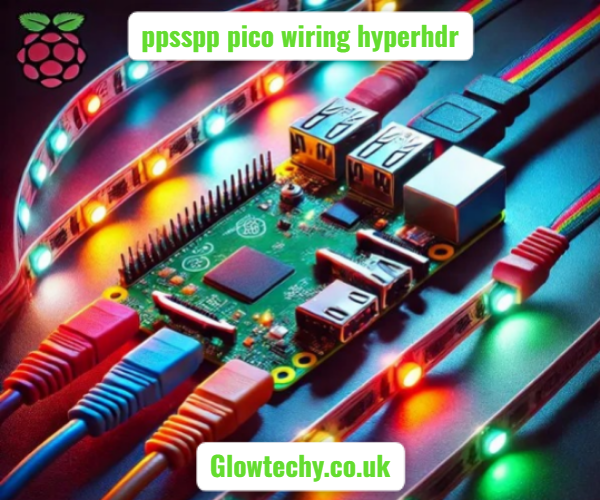
- Pico Wiring refers to using Raspberry Pi Pico (a microcontroller) to manage hardware connections.
- HyperHDR is a fork of Hyperion used to control LED lights for ambient displays with HDR support.
When you combine them, you’re creating a visual effect setup where gameplay on PPSSPP triggers lighting changes via HyperHDR, using signals wired through a Pico board. This is particularly useful for wall-mounted LED setups that mimic Ambilight.
Why Combine These Tools?
The Appeal of Custom Gaming Immersion
The use of PPSSPP with Pico wiring and HyperHDR allows users to transform any basic display into an immersive gaming zone. Here’s why this setup is growing in popularity:
- It enhances gameplay with synchronized lighting.
- It’s cost-effective for a home-built Ambilight solution.
- Works well for streamers and game content creators.
- Provides HDR-friendly ambient lighting not supported by stock Hyperion.
- Improves visual clarity, especially in fast-paced PSP games.
Required Hardware and Software Components
What You’ll Need to Get Started
Let’s not waste time—here’s what you need to complete this project.
| Hardware | Software |
| Raspberry Pi Pico (or Pi 4) | PPSSPP Emulator |
| WS2812B or SK6812 LED Strip | HyperHDR Image/Software |
| HDMI Capture Card | HyperHDR Web Interface |
| Power Supply (5V 10A) | Windows/Linux/Raspberry Pi OS |
| Micro USB Cable | Arduino IDE or Thonny IDE |
Ensure you’re using individually addressable LEDs for dynamic lighting, and make sure your HDMI source is compatible with capture.
Wiring the Pico with LED Strip
Step-by-Step Pico Wiring Process
To wire your Raspberry Pi Pico with an LED strip for HyperHDR:
- Connect the Data Line from the LED strip to GPIO pin 0 on the Pico.
- Power the LED strip with a dedicated 5V supply.
- Ground must be common between the Pico and LED strip.
- Use resistor (330Ω) on the data line and capacitor (1000 µF) across power lines.
- Flash the Pico using Arduino IDE with a script compatible with HyperSerialWLED.
These steps create a serial connection interface that HyperHDR can recognize and control via USB.
Configuring HyperHDR for Serial Communication
Web Interface and Serial Mapping
Once wiring is complete:
- Open the HyperHDR web UI.
- Go to LED Hardware > Devices and select Serial > HyperSerialWLED.
- Choose the correct serial port (usually /dev/ttyUSB0 or COM3).
- Set your LED count, color order, and frame rate.
- Save and restart the service.
Now, HyperHDR should communicate effectively with the Pico setup and start controlling your LEDs.
Connecting PPSSPP to the LED Setup
Capturing Display from Emulator
PPSSPP does not natively support HyperHDR. So you need a capture-based approach:
- Run PPSSPP in full screen on your main monitor.
- Use a HDMI splitter and capture card to duplicate and grab the video feed.
- Configure HyperHDR’s capture source to the HDMI grabber.
- Calibrate LED mapping according to your screen size.
Now every screen flash, move, and explosion in your PSP games will reflect through real-time ambient lighting.
Common Issues and How to Fix Them
Debugging Tips
Troubleshooting this setup can get technical. Here’s how to handle common roadblocks:
- LEDs not responding? Double-check ground and data line continuity.
- Wrong colors? Try adjusting the RGB order in HyperHDR (GRB, BRG, etc.).
- No serial detected? Ensure correct USB driver and check port name.
- Laggy lights? Reduce LED count or increase baud rate in the firmware.
- Lights not syncing with gameplay? Confirm correct HDMI source is captured.
Optimizing for HDR Content
HyperHDR vs Hyperion
Many users switch to HyperHDR over standard Hyperion due to HDR support. This is crucial because HDR content often fails to trigger correct color interpretation. Here’s how HyperHDR fixes this:
- Auto HDR-to-SDR tone mapping.
- Improved color calibration tools.
- Integration with HDR-capable grabbers (like UTV007 clones).
Alternatives to Pico Wiring
What if You Want Something Easier?
If Pico wiring sounds too complex, here are other solutions:
- Use ESP32 boards preloaded with WLED.
- Use Ambilight HDMI kits with built-in microcontrollers.
- Consider Philips Hue Sync Box, though it’s costly.
Still, the Pico wiring method is the most customizable and budget-friendly.
Tips for Clean and Efficient Wiring
Avoiding Clutter and Interference
To keep your setup clean:
- Use heat shrink tubes and proper soldering for long-term durability.
- Keep data lines shorter than 1 meter.
- Shield USB cables to prevent flicker due to interference.
- Always use dedicated power supply for LEDs.
Real User Setup Example
Community-Proven Configuration
Let’s take a look at a real-world example:
| Component | Used Part |
| Emulator | PPSSPP on Windows 11 |
| LED Controller | Raspberry Pi Pico |
| LED Strip | WS2812B (60 LEDs/m) |
| Capture Card | HDMI-to-USB UTV007 |
| HyperHDR Version | v19.0.0 |
The user achieved zero-delay sync, full ambient LED effects, and ran titles like God of War: Ghost of Sparta with rich lighting immersion.
The Future of DIY Ambilight for Gamers
Modular, Open-Source, and Limitless
With open-source platforms growing rapidly, DIY setups like this will only become more powerful and easier to deploy. PPSSPP paired with wired ppsspp pico wiring hyperhdr lighting setups is a future-proof solution for any gamer wanting both flexibility and immersive feedback.
Final Checklist Before You Game
Is Everything Ready?
Before you boot your favorite PSP title, double-check:
- 🔲 LED wiring and power supply are stable
- 🔲 HyperHDR serial port correctly mapped
- 🔲 HDMI source is captured properly
- 🔲 Emulator resolution matches LED mapping
- 🔲 No flickering or overheating
Bullet Point Summary
- Use Raspberry Pi Pico with WS2812B LED strips for DIY ambient lighting.
- Flash Pico with HyperSerialWLED firmware to connect with HyperHDR.
- Configure HyperHDR using the Web UI with correct serial port and LED count.
- Use HDMI capture to sync PPSSPP screen output with lights.
- Troubleshoot common issues like color order, serial port errors, and lag.
Conclusion: Elevate Your Retro Gaming with Style
Combining ppsspp pico wiring hyperhdr offers a next-level gaming experience that’s both nostalgic and visually stunning. Whether you’re a hobbyist, a developer, or a hardcore gamer, this setup gives you full control over how your environment reacts to gameplay. With just a bit of technical know-how and attention to detail, you can light up your gaming world in ways that make even modern consoles feel a bit jealous.
FAQs
1. Can I use an ESP8266 instead of Raspberry Pi Pico?
Yes, but make sure the firmware is compatible with HyperSerialWLED or WLED, depending on your configuration.
2. Does PPSSPP need special plugins for HyperHDR?
No plugins needed. The video capture approach using HDMI splitter and grabber handles it all.
3. Is HyperHDR safe for long gaming sessions?
Absolutely. As long as you use a reliable power source and ensure adequate ventilation for the controller, it’s safe for hours of immersive lighting.